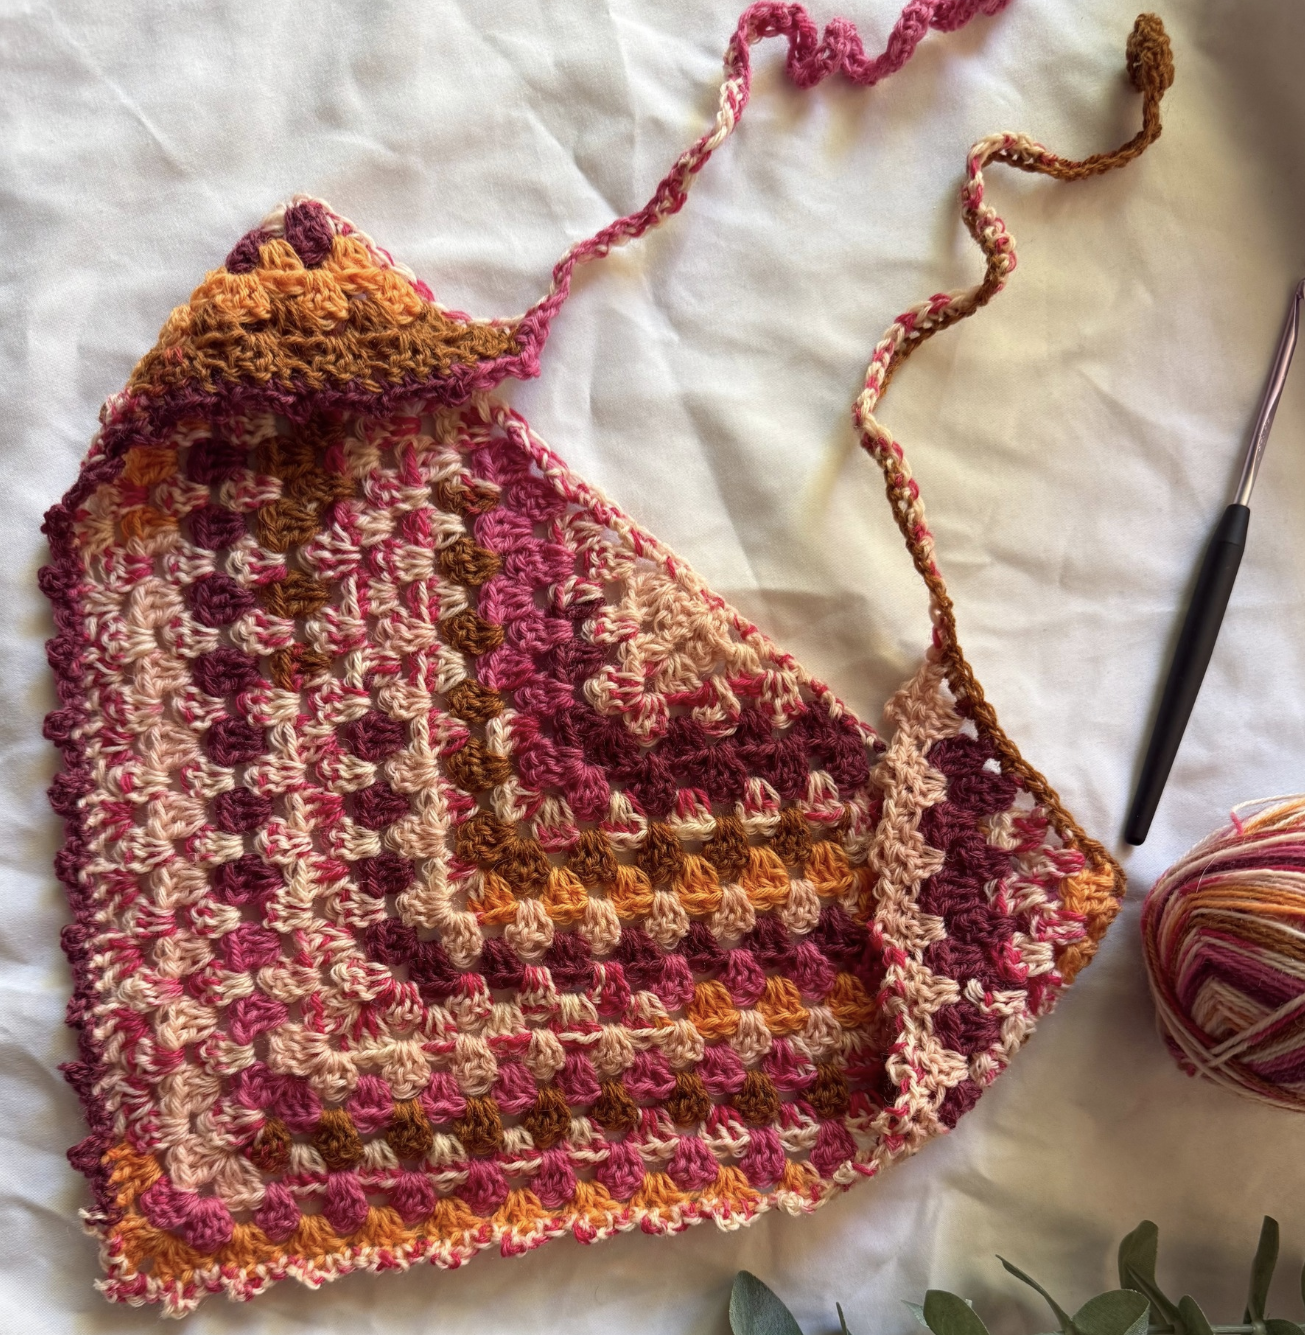
Welcome back to my blog! Introducing the Daily Bandana – a stylish, versatile accessory you’ll want to wear every single day. This pattern is simple, quick to make, and adds the perfect handmade touch to any outfit. Whether you’re heading out for a walk, packing for a weekend getaway, or just need a cute solution for a messy hair day, this bandana has you covered (literally!).
The design is beginner-friendly but still interesting enough to keep seasoned crocheters engaged. It works up quickly with minimal yarn, making it great for last-minute gifts, market prep, or busting through your stash. You can keep it classic with a solid color, or mix things up with stripes, it’s so easy to customize!

Best part? The pattern is totally FREE and beginner-friendly — perfect for stash-busting and warm-weather crafting.
This pattern is made to fit an adult but you can easily make it as big or small as you want.I made mine with superfine cotton/silk/rayon blend to keep it breezy for summer, but any yarn will work! Keep scrolling for the complete written pattern and video link!
Also don’t forget to check out my Instagram to see all of the amazing versions that my pattern testers created. They are the best!! <3

To purchase the inexpensive ad-free PDF download of this pattern, you can do so here!
A quick disclaimer—Please do not copy, redistribute, or resell this pattern in any way, including creating a video tutorial. You may sell your finished piece but please credit me as the pattern designer.
If you share your piece on social media, please credit me as the pattern designer. I would love if you tag me!! I really enjoy seeing your beautiful work.
This post contains affiliate links, I may earn a small commission if you shop from my links with no additional cost to you.
Materials
- Yarn – any yarn! I used about 30 g of super fine weight (1) Daily Stitch Sock Yarn
- Hook – 4 mm (I use these!)
- Tapestry needle – to weave in the ends
- Scissors – to cut your yarn
- Stitch Markers
- Measuring Tape
Gauge
18 st x 11 rows of dc = 4” x 4” (10 x 10 cm)
**Gauge is not crucial to this pattern if you are using made-to-measure method. Don’t stress over it!
Abbreviations
Sl st = Slip Stitch
Ch = Chain
Sc = Single Crochet
Dc = Double Crochet
St = Stitch
Sp = Space
Sk = Skip

Important Pattern Notes
- This pattern uses US crochet terms.
- Pattern in brackets [] are worked all in the same stitch/space.
- This pattern is size graded, however you can make-to-measure also & use any yarn/hook you like.
- You will work the bandana from the middle outwards, then you will add a picot border and ties all using a continuous strand of yarn.
Measurements
This pattern is one size and will fit adults. You can also easily adjust the size by increasing/decreasing the amount of repeat rows.
Special Stitch
This pattern uses Picot which is simply 3 chains and a slip stitch.
- Picot: chain 3 and then insert hook into the third chain from hook and make a slip stitch. This creates a cluster of chains on top of your work.

Let’s get started!
Written Pattern
Row 1: Create a magic circle. Ch 4 (this will count as your first dc and a ch 1). In the ring, dc 3, ch 2, dc 3, ch 1, dc.
Row 2: Ch 4 and turn (counts as a dc and a ch 1). Dc 3 in the first ch 1 space. [Dc 3, ch 2, dc 3] in the next ch 2 space. Dc 3 in the next ch 1 space, ch 1, dc 1 in the last stitch (the third ch of the ch 4).
Row 3: Ch 4 and turn (counts as a dc and a ch 1). Dc 3 in next space(s). [Dc 3, ch 2, dc 3] in the ch 2 space. Dc 3 in the next space(s). Ch 1, dc 1 in the last stitch (the third ch of the ch 4)

Row 4 – 18: Repeat round 3 until you have 18 rows total, or until the length of the long side of your bandana is about 19 inches.
Row 19: Ch 1 and turn. Sc in the first stitch, then in the space, and then in the next stitch. *Picot (this means a to ch 3 and then sl st in the first make ch). Then sc in the next 3 stitches. Repeat from * all the way down the side. At the top ch 2 sp you will have a sc, picot, and another sc all in that sp. Then sc in the next 2 stitches. *Picot, then sc in the next 3 stitches. Repeat from * again down this side.

Now you will make the first tie. Ch 60, sc in the first ch from hook and all the way down.
Work along the last edge of your bandana. Sc evenly across. You will be working into the raw side of the stitches. Make 2 sc in each sideways dc and once where the magic ring is.

When you get to the end, make the next tie. Ch 60, sc in the first ch from hook and all the way back. Sl st to join and fasten of yarn.
Weave in all ends and…

You’re all done!
I would LOVE to see your creation! If you crochet this Flower Shrug please tag or DM @woolymamacrochet on Instagram so I can like & share!
If you have any questions or need help, PLEASE send me a message or leave a comment on this post.
If you enjoyed this pattern, please check out my other free patterns for wearables! Like the Seaside Shrug, Lovely Lacy Top, Granny’s Cabin Shrug, High Neck Granny Halter Top, Checkerboard Beanie or Coco Summer Crop Top! Thank you for checking out my blog and be sure to subscribe to my email list so you never miss a new free pattern!
